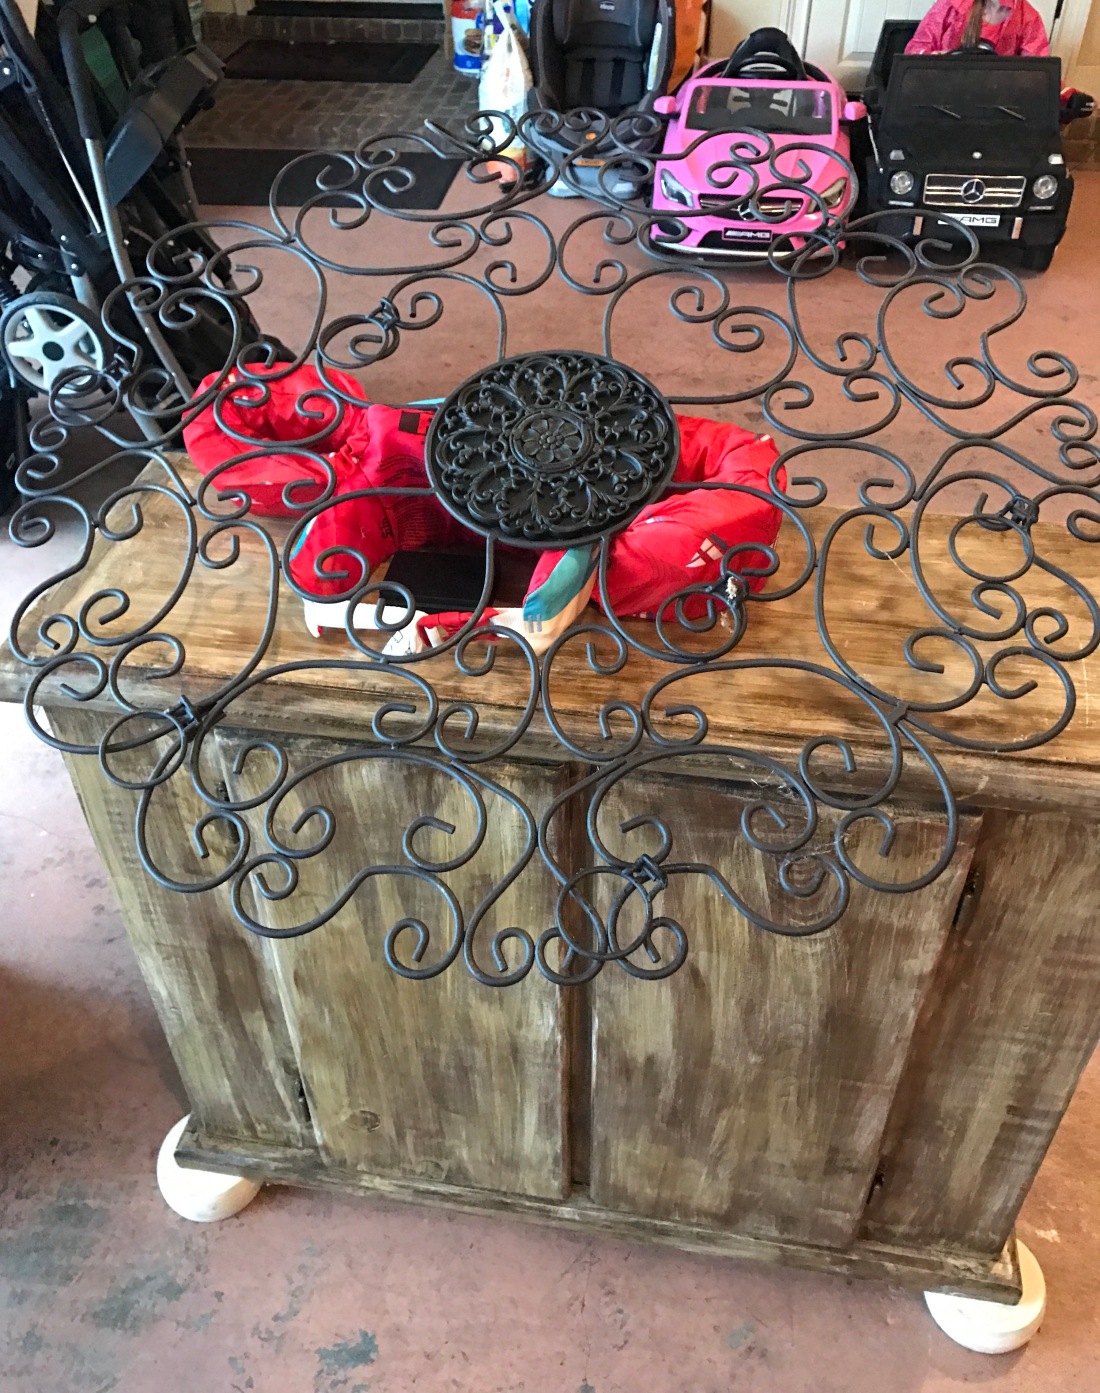
I purchased this cabinet at the ‘rainy day’ yardsale last weekend. If you get a chance, scroll back to last Monday to see what else I picked up. I got this cabinet, the red puddle jumper for my grandson, a “screw-out” tool set for my husband, and the metal wall decor piece complete with candles all for…drum roll please…$10!
Now…I don’t love this little cabinet. The feet on it make me think of a flotation device or hockey pucks☺️. Also, the paint on it isn’t as flattering as I would like. So I began to brainstorm a bit. I settled on the idea of stenciling some meaningful words on top. After visiting Joann’s craft store, I was in sticker shock. The one single stencil that I liked was $7.99! I paid less then $5 for the whole cabinet!🙁

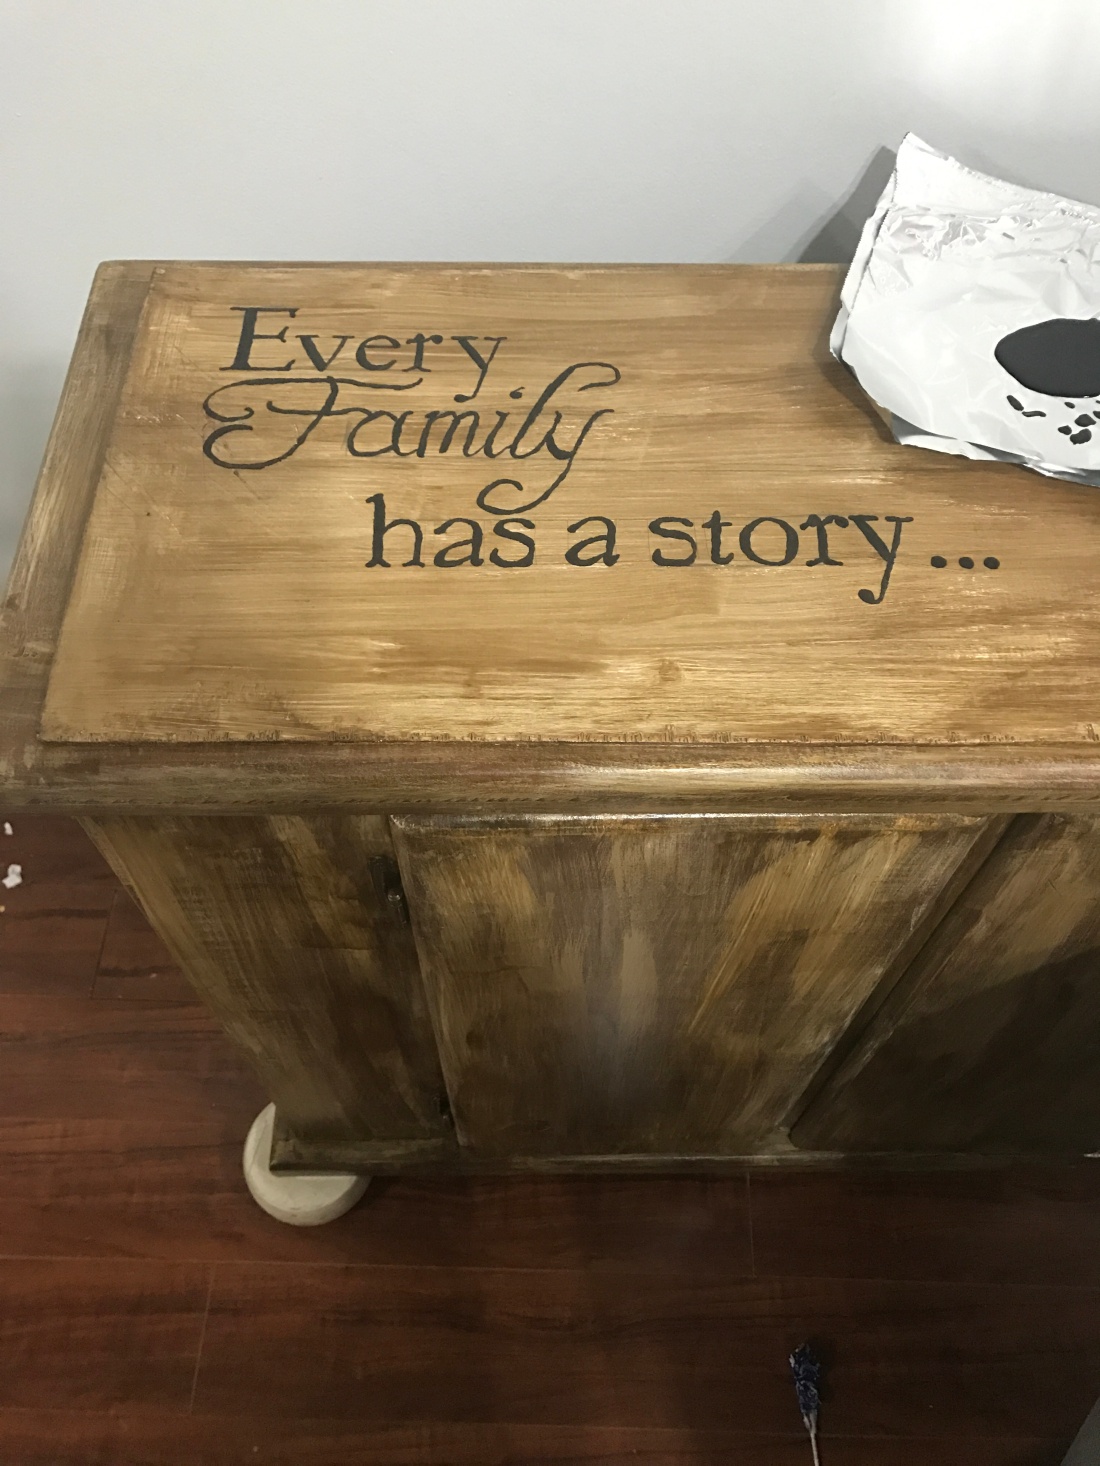
I decided I would try to free hand these words on the cabinet myself using a single bottle of black craft paint for 99 cents. I knew that this black paint could be watered down a bit and used to further distress the wood. So it does double duty… sounded good to me☺️.

I began to have a little bit of anxiety when I got home. What if I can’t make the letters line up correctly and it ends up looking like a child painted it? That might be cute, but not exactly what I was going for☺️. Sometimes these things require us to have a little faith☺️! Or at least do a test patch to make sure the paint will wash off easily if it turns out to be hot mess😉. I did both!
I gave myself a little pep talk and began to measure off where I wanted the letters to go and about what size they needed to be. Then I painted….and painted… and painted. It took forever just to get these simple words painted! The distressing of the wood only took a few minutes and was a nice break from the tedious lettering. For that, I simply used some of the black craft paint mixed with a bit of water and applied it with a paintbrush. I focused on the corners and crevices to hopefully achieve a few highlighted areas. Sometimes I would get a little too much paint in one area. I would just rub it off with a rag and start over.
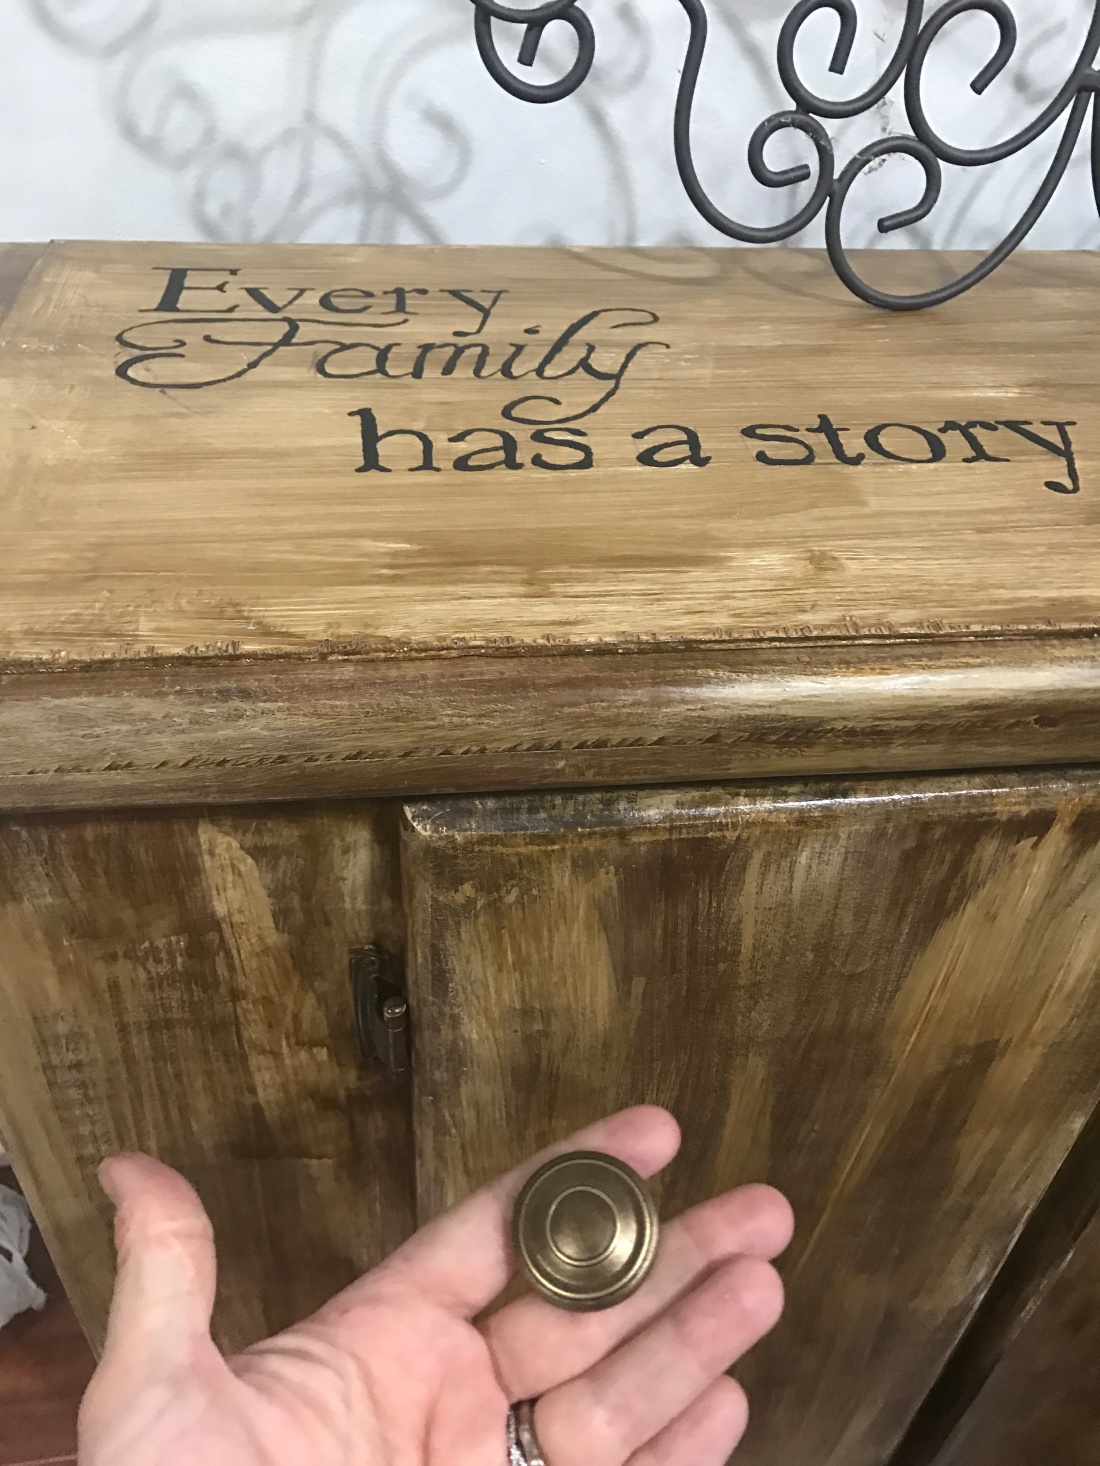
The next day, I went to Lowe’s and found these knobs that matched the hardware on the doors almost perfectly. They were $1.87 per knob, which wasn’t too bad. My husband and I attached them, then we removed those odd looking,hockey puck, feet from the bottom.
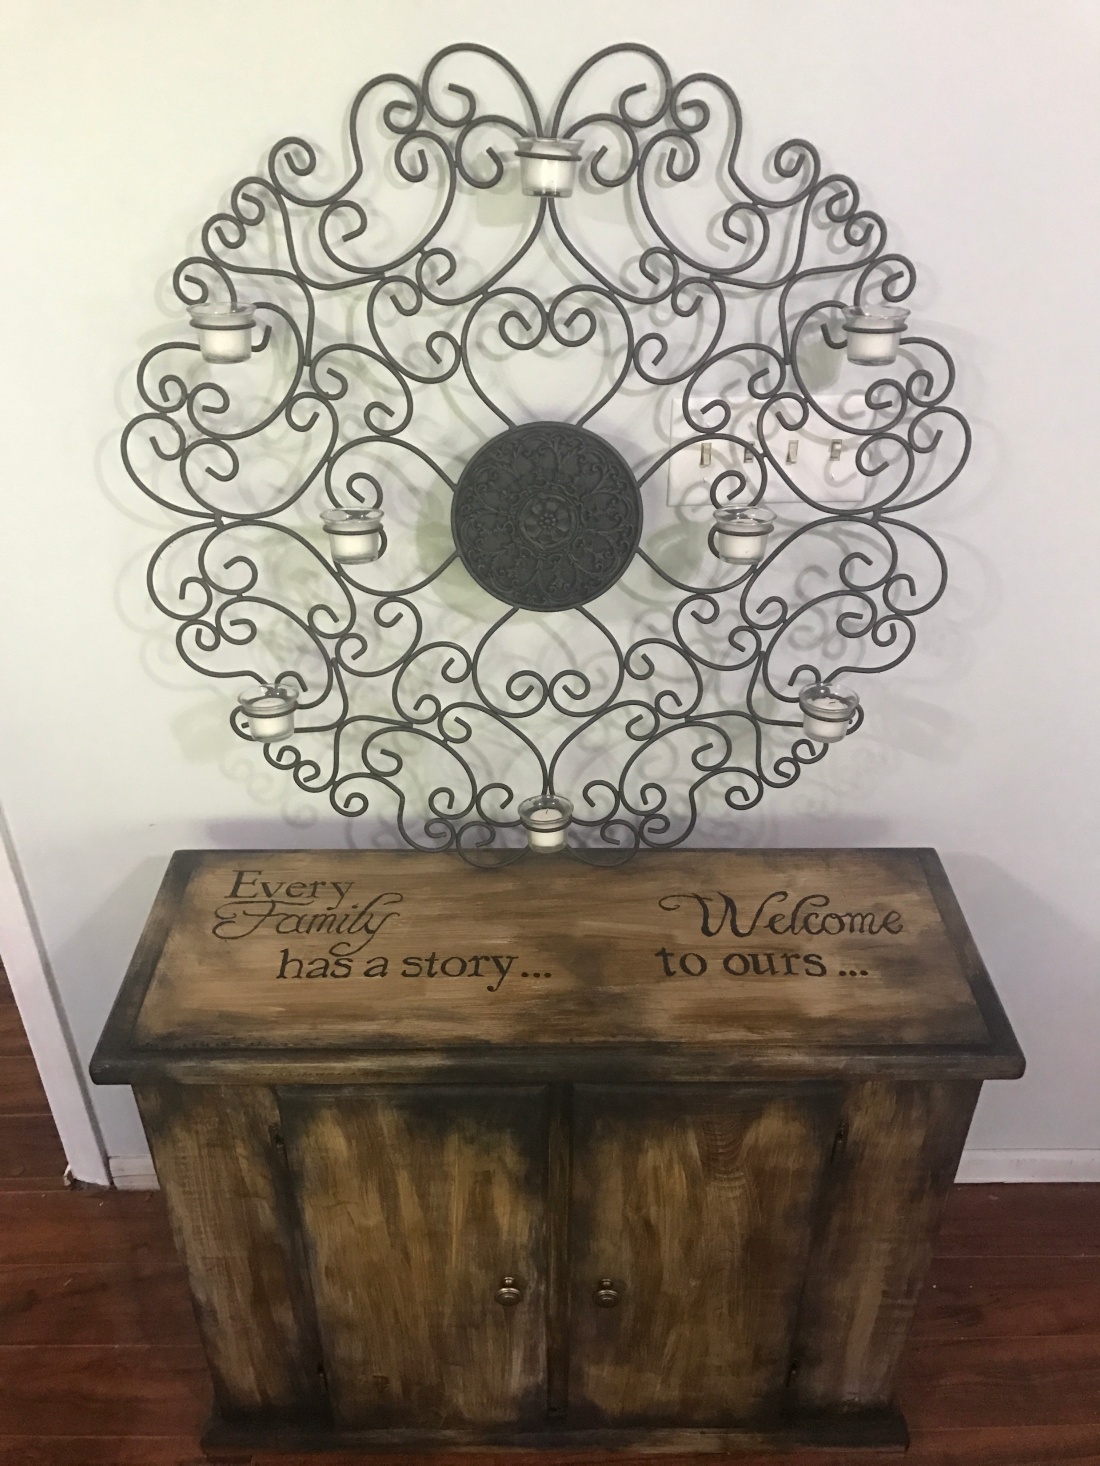
I think it looks pretty good. Not perfect, but good enough. My oldest daughter needed something to go on a wall in her home so I think this will work well with the metal wall hanging. This cabinet has lots of storage space underneath for toys, cleaning supplies, or whatever. I estimated that I paid about $8 for this cabinet after the upgrades. I think this will be a nice surprise☺️.
What do you think of this little furniture redo?

LOVE the cabinet re do!! Its beautiful!!
LikeLike
Thank You!
LikeLike
Wow! Awesome! It’s fun to see what can be done with a lot of creativity and just a little money. I’m sure your daughter will be thrilled with the special touches you put on the cabinet, and with the nice wall hanging too!
LikeLike
Thank you, she did love it.
LikeLike
I think you did a great job and well done on the free hand lettering!
LikeLike
Thank you!
LikeLike